


PC Repair Rip-Offs: Don’t Get Gouged by Fix-It Services
As mentioned in this very nice article… by http://www.pcworld.com/
Computers don’t always work as they should. Components fail, and operating systems fill up with crap that hinders performance and occasionally brings the whole machine to a halt. Savvy users know that they can fix most PC problems themselves, and use sites like PCWorld.com to find solutions to their tech problems. Those who lack confidence in their tech skills, however, often fall prey to the rapacious tactics of online and local repair shops.
read more at …As mentioned in this very nice article… by http://www.pcworld.com/
full credit and sources goes off to …
http://www.pcworld.com/article/214366/pc_repair_ripoffs.html
Big or small reason not to update to Windows 10
Big or small reason not to update to Windows 10 J
You decide!
Windows 10 lost classic elements such as desktop gadgets, the computer games Solitaire and Minesweeper (they will be replaced by new versions). And users will be forced to play patience with display advertising. Get rid of it and get the bonus features for only be for the money ($ 1.49 per month / $ 9.99 per year). Microsoft follows the same strategy with Windows 8 / 8.1, but the games did not come bundled in the operating system, and has been available as an additional download.
How To check the temperature of CPU, motherboard and video card from within Windows?
Computer from overheating can cause instability in the work, and if no deal with the overheating may occur serious damage.Danger of overheating is compounded if you are overclocking your processor, which is faster than its rated speed.You need special software to determine the temperature of the components of your computer, because not all motherboards and processors are able to display their level of temperature.
Instructions
1.Open an Internet browser, go to the sitehttp://almico.com/speedfan.phpTo download a program to monitor the system «Alfredo Milani Comparetti’s SpeedFan».The monitoring program determines the temperature of your CPU, motherboard and video card.
2.The left mouse button double-click the downloaded file from the Internet to start the installation program.Follow the instructions to install the software on your computer.Depending on how you configure the operating system «Windows Vista», you may need to confirm the installation in the window User Account Control.
3.Click on the “Start” menu in the lower left corner of the screen, then go to “Programs”, then «SpeedFan».In this folder, click on «SpeedFan» to launch the application.It will take several seconds to determine your temperature parameters of system components.
4.Look at the number next to the «CPU», on the tab «Readings» program to check the temperature of your CPU.If you have a processor with multiple cores, each of them will have a separate sign next to the number of the nucleus, starting with the «Core 0″, because as usual computers start counting from 0 rather than 1.
WATER DISASTER – What to do if you spill water on your laptop!
There are situations in life when you accidentally spill your favorite sweet or strong coffee lemonade on your expensive laptop and this is where panic starts, what to do?here are the first thoughts that crawl into your head.Next, describe your actions that you were always ready for such situations and get out of them with minimal losses so we go.
1.Act quickly
I understand that you can not be completely sober or boisterous company does not give you focus and yet as quickly as possible off a computer keyboard ustroystvo.Esli then pull the cable from your computer if it is then immediately pull out the laptop battery, same thing with mobile phone . Remember the golden rule of all liquids conduct electricity poeetomu in order to avoid short circuits, disconnect it immediately.Since the liquid slowly spreads inside your affected devices have a chance that she did not have time to short the major sub-assemblies.So that the speed and the speed again.
2.Assess the damage
Now when you turn off the device to visually assess the size of the strait, if it is not large droplets lying peacefully on the keyboard then take a wet alcohol wipes and wipe lightly, let dry.
If large enough that the strait will have to resort to demolition.Please note if you are not when it did or did not know exactly how to do it better, contact sales obsluzhivanie.Esli not afraid to feel free to take a small screwdriver in hand and begin to shoot accurately keys. Remember to take pictures of the keyboard that would not then think where which button was.
Next, wet wipes wipe thoroughly enough space filling, do not forget that all liquids other than water unless they are washed thoroughly and then they will become sticky.This may influence later on zaedenii keys.
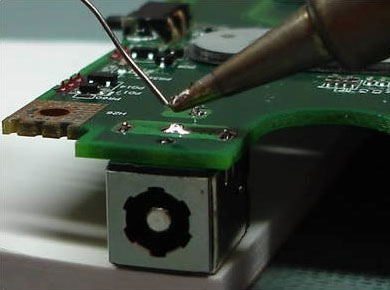
3.Cleaning of printed circuit boards
If all went strait to the same printed circuit boards that are indiscriminately you can not do.
Carefully unscrew all the screws from the housing, put them all in size in different places, it is well suited for packaging of yaits.Sdelayte photos before razborkoy.Otkrutite screws from the PCB will have to remember that to make an effort and in order not to damage the fragile PCB select the appropriate screwdriver screws.Now, using cotton swabs and alcohol to gently wipe board.
If the pollution Nuu great there is another option disconnect all cables from the board and put it in a container with warm soapy water, wait until the spots themselves are not cleared about an hour, 2-3 and then just pull the board and allow to dry.This is best done using a hair dryer cold vozduhom.Posle that as sure that all parts are dry perfectly possible to start sborke.Zakrutite all the screws on the place, connect all the wires and safely turn on your device.
I’d add that I wish you no matter where my article to you in my life have come in handy and has served as a reference.
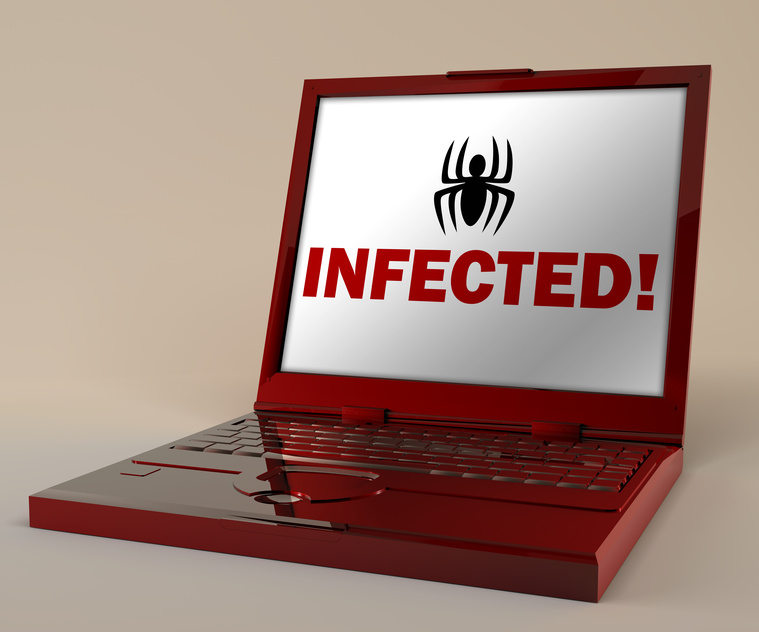
Computer help · Removal of viruses and virus protection
Removal of viruses and virus protection
If you see obvious signs of a virus or suspect that after visiting unsafe Web resources on the computer got a trojan that can send malicious password of your email, your credit card number or other confidential information, please contact our company.The specialist will come and hold a full diagnostics on the computer virus detection, perform the treatment of viruses and install anti-virus protection.
All detected viruses and Trojans are removed by standard antivirus software, or manually.Virus Removal by hand is necessary when conventional anti-virus can not cope with this task, and requires special accuracy and experience.Such experience is to remove viruses from our experts, so you can safely entrust us with your computer.
To further preserve the nerves and reduce the risk of infecting your computer, listen to the recommendations of computer experts who will help you choose the most suitable anti-virus program, will make its installation and configuration of database updates.
As the computer becomes infected with viruses
Virus writers are finding new ways of malware on the computers.The main way of spreading the virus – through the Internet and e-mail.Every time you download a file from the Internet or visit an unsafe site – you risk infecting your computer with a virus.
The consequences of a virus
The main purpose of viruses and Trojans is to steal your personal information for later use by hackers to obtain benefits.Also, the virus infection can have a strong impact on computer performance, lead to the conclusion that failure of the operating system and even to clean the hard disk full of information available.
How to reliably protect your computer from viruses
To optimally protect your computer from viruses, it is necessary not only to establish the modern and high quality software, but also to observe some precautions, especially when connected to the network and the Internet.The presence of anti-virus software by itself does not provide 100% protection against viruses.To protect your computer, follow these rules:
daily update antivirus databases;
open files only from trusted and reliable sources;
Always check the files received via e-mail and files downloaded from the Internet anti-virus programs.
Setting anti-virus program
Antivirus programs have many settings that allow to change the regime and the level of protection from computer viruses.Moreover, the installation offered by manufacturers by default, are not always optimal.Computer Experts do not just install antivirus software and configure it so as to ensure maximum protection against viruses.
Guarantees for services to remove viruses
Since the day there are new versions of viruses and new types, no manufacturer of anti-virus programs can not guarantee the full 100% protection against viruses.The risk of infection by computer virus is particularly high if your computer is connected to the Internet, you use e-mail or connected to a local (house), a network containing a large number of computers.
As a general rule, most major computer services, none of the services to guarantee anti-virus protection is not provided because of the potential inability to complete protection.So if you promise to “100% guarantee” to remove viruses and virus protection, such a promise is a highly controversial and borders on misleading, if not also an offense: a good technician (expert) can confirm the impossibility of providing a full guarantee in the real world.
How do I clean the laser «Blue-ray»-player?
Dust and other debris can accumulate inside your «Blue-ray»-Player.Over time, player’s lens might be dirty and stop working properly or not work at all.To maintain the lens of your player clean you can buy a kit for cleaning.You should buy a set, collected specifically for the format «Blue-ray», otherwise disk cleaning can damage the lens, the drive, or disturb the player.
Instructions
1.Turn on the «Blue-ray»-players.
2.Insert the disc into your player to clear the down side to the fibers.Wait until the player roll out the disk.
3.Click «Play» to begin the cleaning process.Follow the instructions on your screen.These instructions vary depending on the type of disc for treatment.
4.Upon completion of cleaning, remove the disc from your la «Blue-ray»-Player.
How to make 32-bit operating system «Windows 7″ 64-bit?
Operating System «Windows 7″ may be 32-bit or 64-bit.The main difference between these two versions of the operating system is the CPU.Processor 32-bit version can detect up to four gigabytes of RAM, whereas the 64-bit processor sees up to 16 gigabytes.To the 32-bit operating system to make the 64-bit, make sure your processor supports 64-bit instruction set.Otherwise, the 64-bit «Windows 7″ will not work.
Instructions
1.Download, install and run the «CPU-Z» (cpuid.com / softwares / cpu-z.html).Click on the tab «CPU», to see the name and model installed in your computer processor.
2.Go to the developer’s site of your CPU and see his model.To find out if your processor is 64-bit instruction set, refer to the information in the fields of “Command Set” or “operating system”.If the processor uses 32-bit instruction set, it means that your computer can not install 64-bit operating system.
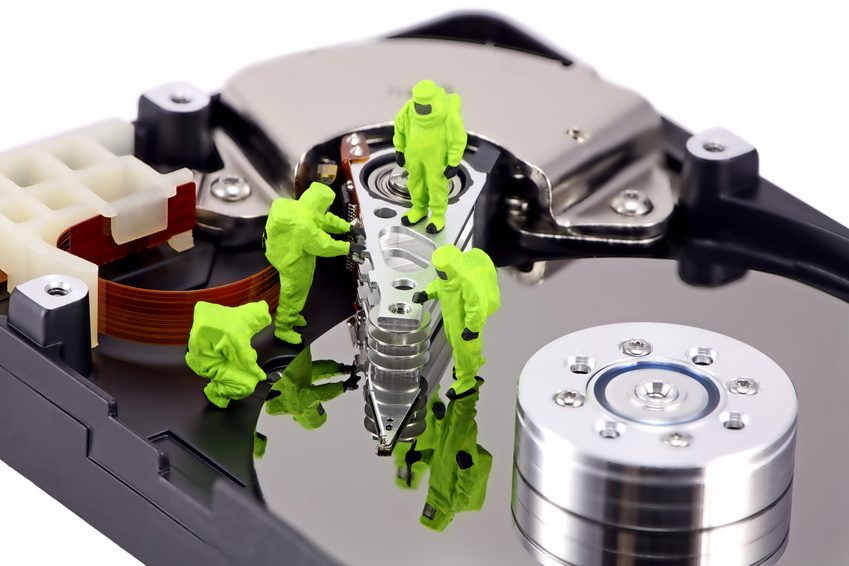
3.Copy all personal data from your computer hard drive to any other media, such as a USB-drive.
4.Go to the site developers of your motherboard or computer model to find them.Download the drivers for 64-bit version and burn them to CD.
5.In the optical drive of your computer, insert the installation disk with the operating system «Windows 7.”Restart the computer.Choose your language, locale and keyboard settings.
6.Click “Next” and then “Install”.Read the license agreement corporation «Microsoft», check the box next line “I accept the license agreement.”
7.Click “Next”, “Advanced”.Select the partition on which the 32-bit operating system «Windows 7.”
8.Click “settings hard disk drive (optional).”To start recording, 64-bit operating system on top of a 32-bit version, click “Format” and then “Next”.Do not press any keys on the keyboard, even if you are prompted to do so.
9.On the “Setting up Windows» enter the computer name and account name, then click “Next.”
10.At the request with a password and click “Next.”Enter the license key for your operating system «Windows 7.”Follow the onscreen instructions to complete installation.
11.Click on the “Start” menu.In the search box, type «devmgmt.msc» (without the quotes) and press «Enter», which will open the “Device Manager”.Click on the arrow next to each category to display the installed components.
12.If you find a device marked with a yellow exclamation mark, which means that an error driver for this device.Install 64-bit version of these drivers with your recorded disc.
Notes
To install the driver from the disk, double click the left mouse button on the file extension «. Exe».
Some devices use drivers format «INF».To install the driver click the right mouse button and select “Install”.
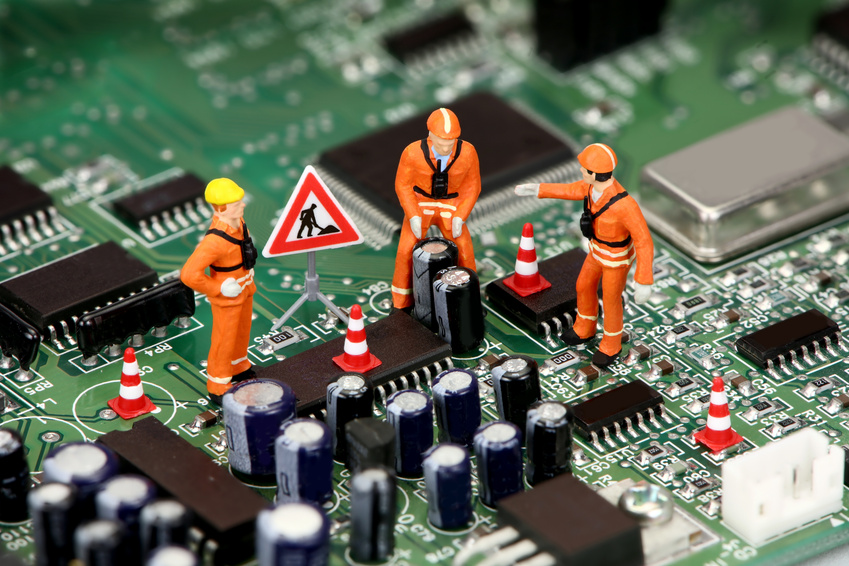
What to do if your computer does not turn on?
Computer in modern life – is more than just a technique that helps in the work.Most often, the computer becomes a necessary and indispensable part of life.So when the computer is not included, or set, your computer will not boot, it can seem more than a challenge, especially when urgent work is not completed or other important business.But do not worry about it too much: when the computer fails to start or how to say “computer will not turn on,” you need to concentrate and perform a series of actions that will conduct an independent diagnostic computer to find out possible causes of failure.
Reasons why the computer will not boot, can be set:
the absence of line voltage;
damage the power cord or extension cord;
the failed (burnt) or exhausted the resources of power supply;
defective motherboard;
damaged contact between the cables or components in the system unit;
a virus;
loosely connected loops devices;
improperly installed boards in the system unit;
and dozens of serious and not very reasons why not start your computer up to the accumulated dust inside the system unit.
What should be done to find out the reason why not start your computer?The first thing to check the voltage on the network.To do this, simply plug into an outlet that feeds your computer, automatically working device (such as a desk lamp, kettle).If this device works – supply voltage and there really is “complex” is not loaded for some other reason.
Then, in the same way checks whether the power cord.Sufficient verification test for the first two reasons of malfunction of computers is when the power indicator lights up on the monitor.If it is intermittent flashes (on some models glows a different color) – with electric power all right.
If all the above steps did not bring solution to the problem, you need to call a specialist – Further diagnostic computers can only be a qualified employee of a computer service center.If your knowledge of computer repairs are reduced to the replacement of a mouse or a monitor, do not try to diagnose yourself – you can inflict even greater damage to your computer.Call the customer service computer experts, and expert computer help to hold a full and accurate diagnosis of your computer, identify the reason for not include “complex”.
The only thing you can do more before calling a service to our computer services – is to try to decipher the signals BIOS.
Signals AWARD BIOS
Signal no.Faulty or not connected to the motherboard power supply.
Continuous signal.Faulty power supply.
1 short.No errors.
2 short.Found minor errors.
3 long.Failed Keyboard controller.
1 long + 1 short.Problems with RAM.
1 long + 2 short.The problem with the card.
1 long + 3 short.An error occurred initializing the keyboard.
1 long 9 short +.An error occurred while reading data from the volatile memory chips.
1 long repetitive.Improperly installed memory modules.
A short repetitive.Problems with power supply.
Signals AMI BIOS
Signal no.Faulty or not connected to the motherboard power supply.
1 short.No errors.
2 short.Parity error memory.
3 short.There was a bug in the first 64 KB of main memory.
4 short.Faulty system timer.
5 short.Defective CPU.
6 short.Faulty keyboard controller.
7 short.Faulty motherboard.
8 short.Faulty video memory.
9 short.Checksum error in the contents of chip BIOS.
10 short.Unable to write to the CMOS-memory.
11 short.Defective external cache-memory (installed in the slots on the motherboard).
1 long + 2 short.Faulty video card.
1 long + 3 short.Faulty video card.
1 long + 8 short.Problems with the video card or monitor connected.
Signals PHOENIX BIOS
1-1-3.Failed to write / read data CMOS.
1-1-4.Checksum error in the contents of chip BIOS.
1-2-1.Faulty motherboard.
1-2-2.Error initializing the controller DMA.
1-2-3.Error while trying to read / write to a channel DMA.
1-3-1.Error recovery of memory.
1-3-3.Error when testing the first 64 kB of RAM.
1-3-4.Error when testing the first 64 kB of RAM.
1-4-1.Faulty motherboard.
1-4-2.Failed memory test.
1-4-3.System timer error.
1-4-4.Failed to access I / O port.
3-1-1.Error initializing the second channel DMA.
3-1-2.Error initializing the first channel DMA.
3-1-4.Faulty motherboard.
3-2-4.Failed Keyboard controller.
3-3-4.Test error of video memory.
4-2-1.System timer error.
4-2-3.Error line A20.Faulty keyboard controller.
4-2-4.Error when running in protected mode.Might have a defective CPU.
4-3-1.Error when testing memory.
4-3-4.Real time clock error.
4-4-1.Error testing serial port.The error may be caused by a device that uses this port.
4-4-2.Error when testing the parallel port.The error may be caused by a device that uses this port.
4-4-3.Error when testing math coprocessor.
How to change the forgotten password of the owner of «Windows XP» ?
The account holder, with its root, is created automatically during installation of the operating system «Windows XP», if not created any account.In case of lost password, the owner can retrieve it using the administrator account or with a different account, disposing administrator.The Administrator account is created automatically when you install the operating system «Windows XP».Usually it is not displayed during startup.There are two basic methods of logging in as administrator.If the first method did not bring positive results, use the second method.
Instructions
Access to administrator account – the way first
1.Restart the computer.
2.Hold down the «Ctrl» and «Alt», press «Delete».Repeat pressing a combination of these keys.
3.In the text field “User Name” enter “Administrator” (without the quotes).
4.In the text “Password” field enter the password for the Administrator account.If the account is not password protected, skip this step.
5.To log in as administrator click the “OK”.
Access to administrator account – how second
1.Restart the computer.
2.Once the message disappears «BIOS» Press «F8».A screen with information about the system components of your computer.
3.Using the arrow keys, select “Safe Mode” and then double-press «Enter».
4.Click on the icon the account “Administrator” and then enter the administrator password.If the account is not password protected, then leave it blank.
5.Press «Enter», and then click the “Yes” to login as an administrator.
Change Password
1.Click “Start” menu and then “Run.”
2.Enter in the “Run” command «control userpasswords2» (without the quotes) and click “OK”.
3.In the window “User Accounts” tab, select the “Members”.
4.Click on the icon “Owner”, then click the “Change password”.
5.Enter the new password twice and click “OK”.
Notes
Alternatively, you can use the disk change the password for the account holder.Click the “Use disk password change” after entering the wrong password in the login box, and then follow the instructions.You must press the «F8» before loading the operating system «Windows XP».If you can not enter into the screen “Boot Parameters”, repeatedly press «F8» before loading the operating system.
How do I create a bootable USB-drive in «Windows 7
How do I create a bootable USB-drive in «Windows 7
If you want to create a bootable USB-drive in the operating system «Windows 7″ to start, make sure that you make a backup or delete all the files on your USB-drive, which will be used.You need to reformat this drive, so all your files will be deleted.Also, you should find a «BIOS», is compatible with your computer download function with USB-drive.
Instructions
1.Right click on empty space on your desktop and select “New”, then from the resulting menu, select “Folder.”Give the new folder name.Copy all the files stored on USB-drive to this folder to store them on your hard drive.Your USB-drive should have at least 4GB of free space available.
2.Click on the “Start” menu on the “taskbar” and select “All Programs”.Click “Accessories”, then locate the “Command Prompt” and click the right mouse button.In the menu that appears, click “Run as administrator”.
3.Enter the command «DISKPART» (without the quotes) and press «Enter» key on your keyboard.You will see the message “Boot disk USB».Next, enter the command «LIST DISK» and burn “Disc number” for your USB-drive.
4.Enter the following command and press «Enter» key after each command entered.If the “disk number” for your USB-drive is “Drive One”, then use that number.
SELECT DISK 1
CLEAN
CREATE PARTITION PRIMARY
SELECT PARTITION 1
ACTIVE
FORMAT FS = NTFS
ASSIGN
EXIT
5.Minimize “command line”.To do this click on the icon “-” at the top.Insert the disk with the operating system «Windows 7″ in the optical drive of your computer.Check the letters in the name of your optical drive and USB-drive.Double clicking the left mouse button, open “My Computer” on your desktop and somewhere write these letters.
6.Restore window “command line” and enter the command «D: CD BOOT» and press «Enter» (instead of the letter «D», specify the letter of your optical drive).
7.Enter the command «BOOTSECT.EXE / NT60 H:» (instead of letter “H” indicate the letter of your USB-drive).Copy all files from the installation disk with the operating system «Windows 7″ on USB-drive.Close the “Command Prompt”.Remove the disc from your optical drive and restart your computer.
8.Log in «BIOS» Press «F10», «Delete» or «ESC».Using the appropriate keys, follow the instructions for navigating «BIOS».You should change the boot order so that the first boot from USB-drive.Press «ESC» to save the settings and exit «BIOS»
- Untitled
- Untitled
- Untitled
- Untitled
- Untitled
- Untitled
- Untitled
- Mark Zuckerberg apologizes to families over social media harms in contentious Senate hearing
- Untitled
- What is catfishing and what can you do if you are catfished?
- CEOs of Meta, X, Discord, TikTok and Snap testify before the Senate Judiciary Committee
- Untitled
- Untitled
- Untitled
Click image to view large map.
Special offer for AU students - FREE PICK UP & DELIVERY!